
If you’ve spent any amount of time on the internet or Pinterest, you’ve come across an epoxy river table. These tables or surfaces are unique, and eye-catching, and can elevate any space they’re in. Epoxy river tables are also easy to make and a favorite amongst beginner and pro DIY enthusiasts! They offer a beautiful and functional option for anyone with a flair for style and design. 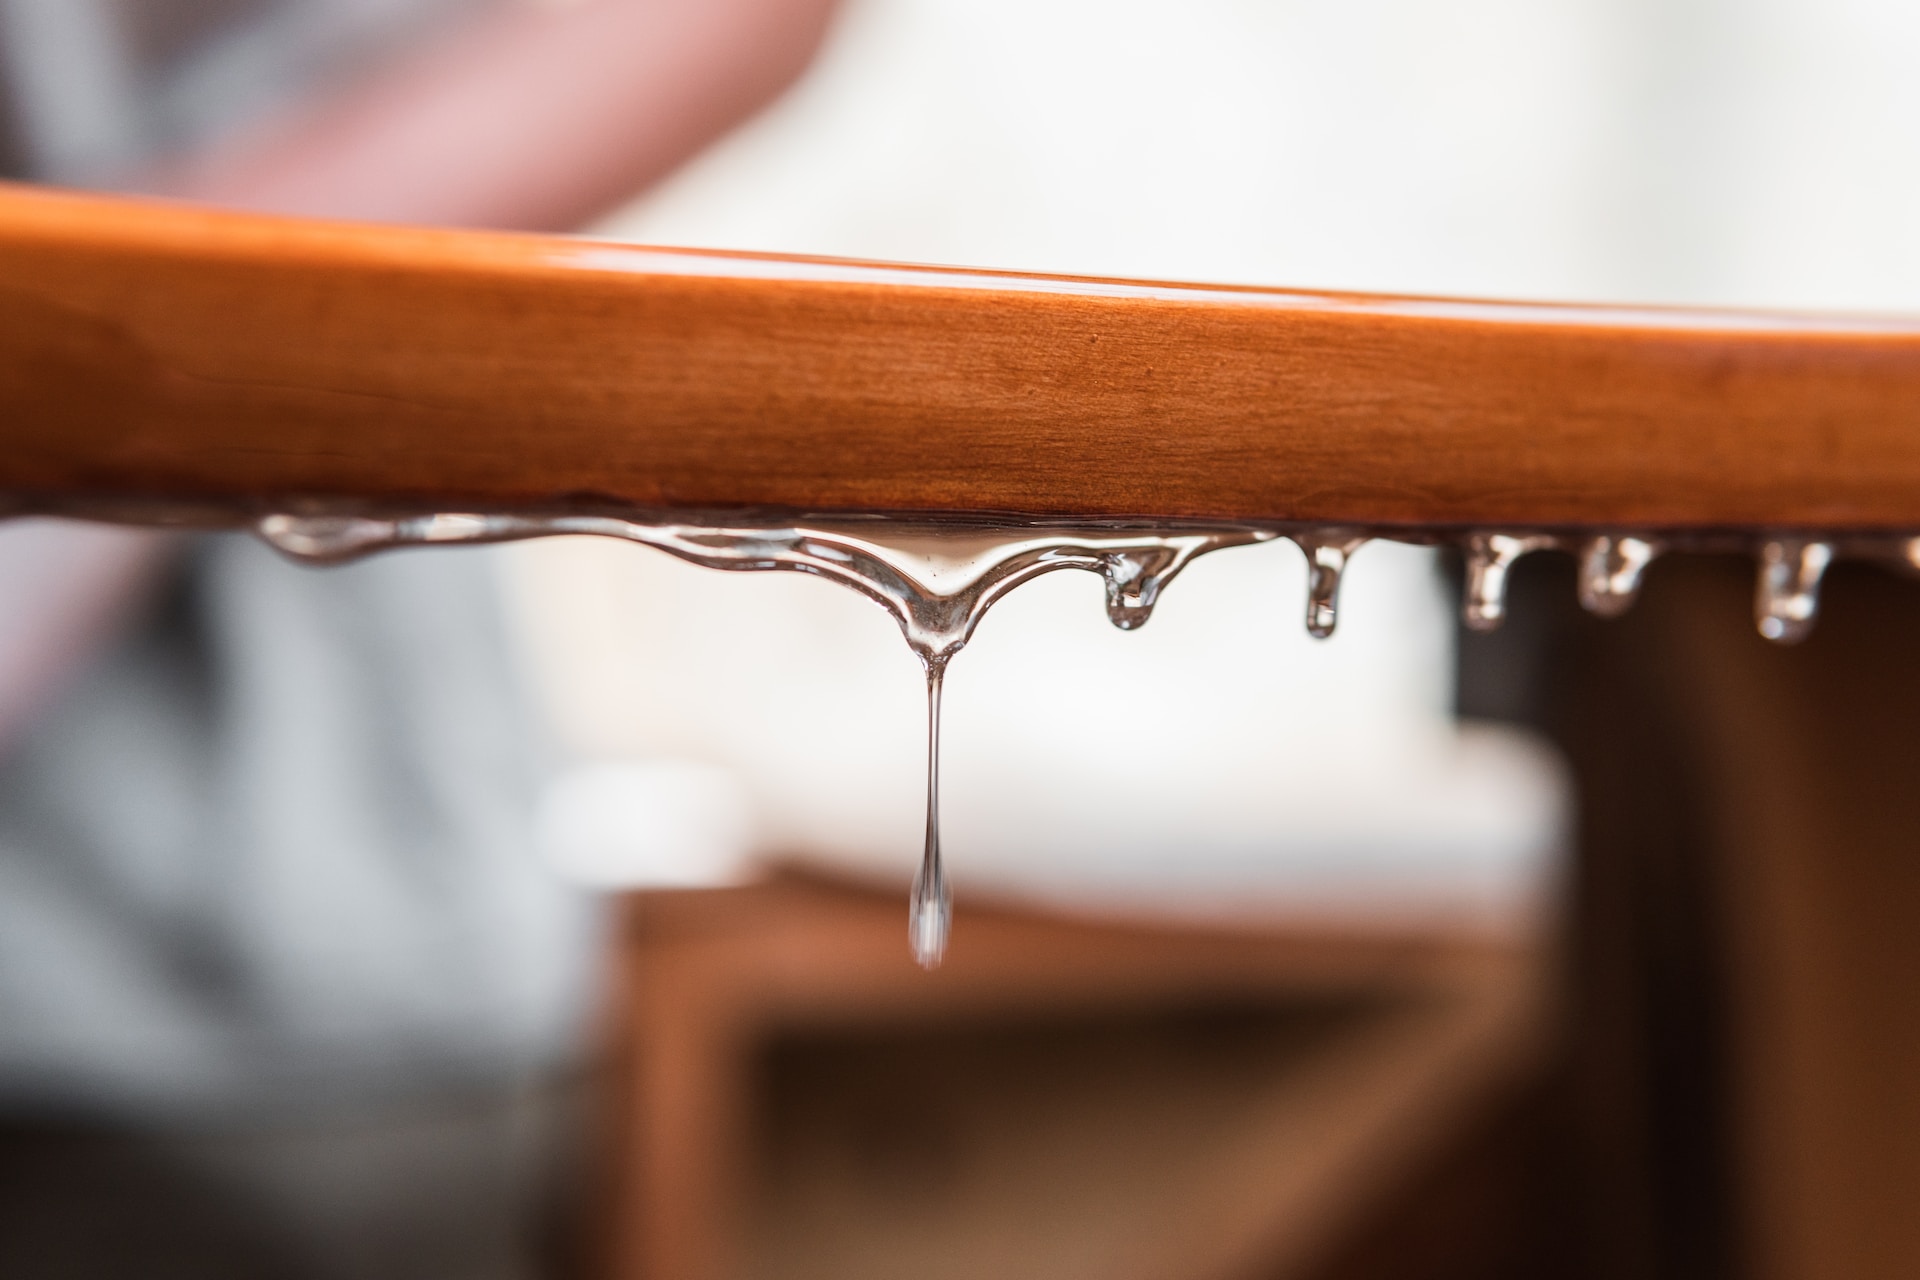
Whether you’re looking for a fun new DIY project or you want to impress your next guests with a new table, you’ve come to the right place! Here’s everything you need to know about epoxy river tables and how to make one from scratch, the right way! Follow this guide and be the envy of your visitors and DIYers alike!
Before stepping into any kind of resin DIY project, it’s important to do your research and know what you’re getting into. While resin tables are very beginner-friendly, they can still be tricky for most newcomers. Start by finding inspiration on the type of river table you want to make and look for some tutorials.
Read up on some tips and tricks and ask someone with more experience or a professional for help. Research and look up what kind of tools and materials you’ll need to make your table and get to work getting them. A little research goes a long way in terms of DIY work, so make sure you do ample! Unless you want to waste a bunch of materials, damage your property, or hurt yourself, do your research!
The main materials you’ll need to make a resin table of any kind is a wood-type material, and something to bind it. If you’re working with epoxy resin, you’ll need to know how much resin is needed for your project. Do some calculations and prep your resin so that it’s ready to go when you need it. Measure out your table supplies to help you with your calculations and to know how much space you’ll need to work.
The other component of your materials that you need to prepare is your wood. Depending on the type of style or effect you’re going for, there are plenty of wood-type materials to choose from. Play around with texture, color, and style until you find the right material for you. Whatever material you use, make sure it’s easy to work with and cut and work with.
Once you’ve gathered all your table materials and you know what to do, gather the tools you need to make it happen! Depending on the type of resin river table you want to make, the tools you’ll need may vary, but there are a few basics. You’re going to need a sander, a bucket, a caulk gun, and something for mixing and for your mold.
You’re also going to need something to cover the area you’re working in, to avoid any spillage or accidents. For creating your mold, you’ll need a thick sheet of plastic to put on your working surface to hold the epoxy resin. Make sure to have cleaning tools on hand and remember, safety first! Wear safety goggles when you sand and remember to wear your gloves at all times!
Whether you’re making a river table or charcuterie board, you’re going to need to shape and sand down your wood. To create an interesting visual effect you can use a log of uncut, raw wood, but normal, pre-cut planks of wood are fine too. If you’re cutting your wood from a log, make sure to cut them in equal sizes.
When choosing wood for your table/board, mix and match until you find the right pair, just make sure they’re the same size. For an interesting effect, put the live edges of the wood facing each other on the inside, and the hard-cut corners on the outside. This will give your table a more traditional shape on the outside while having an interesting design in the middle. Once you’ve chosen and placed your wood, sand it down before adding the resin.
Now that all your tools and wood are prepped and ready, you can get to work creating your mold and starting your project! The mold is the most important part of your river table that gives it that special look. To make your mold, set down your pieces of wood on thick plastic pieces, and with a caulk gun, glue them to the wood and to each other. This will ensure that no resin spills over and that you’re ready to pour. Reinforce the ends of your mold with a bit of metal tape for extra strength.
After you’ve created your mold, you can start mixing your resin and preparing it for poring. Depending on the style or look you’re going for, the ingredients will vary for your resin. You can use pigments, glitters, fillers, or simply clear, transparent resin for your river table. Whatever you’re using, mix it well with a handheld blender or mixing stick and prepare to pour!
Once you’ve mixed your resin, it’s time to slowly pour it into your mold and let the magic happen! Pour slowly by covering the bottom of the gap between your wood first and letting it rest for a few seconds before pouring the rest. Pour in your resin layer by layer until you reach the top. If you want to add different layers, wait for 24h until the first one has gelled before adding the second one. Remove any bubbles with a butane torch or an alcohol spray bottle.
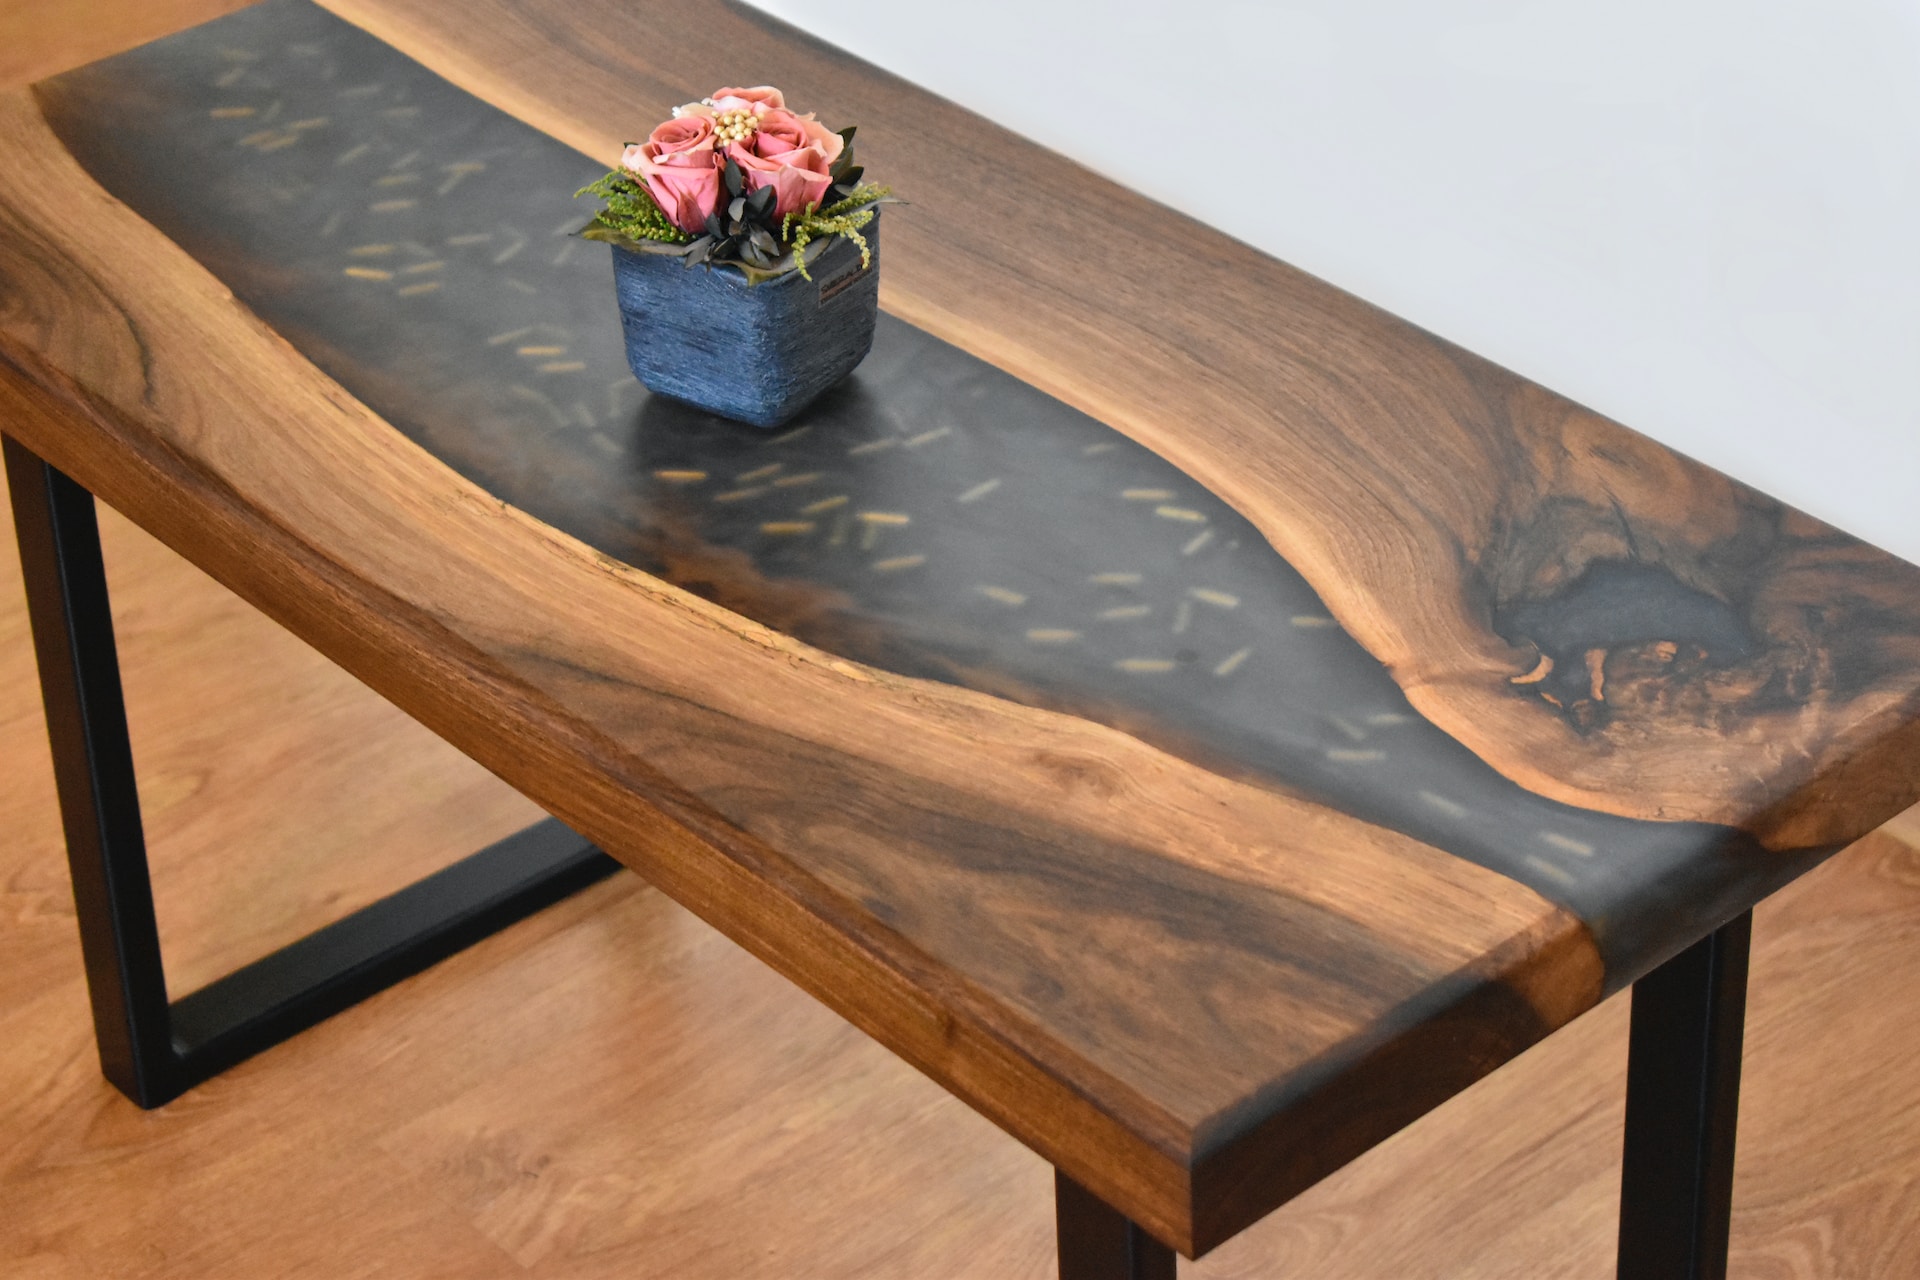
The final step of creating an epoxy river table is letting the resin dry and sanding it down. Once the resin is fully cured, remove the plastic mold, the caulk, and any other extras and sand down your resin river. Apply a final topcoat and buff out or polish your table and it’s good to go! Epoxy river tables make a great present or addition to any home!
So there you have it! With this guide in mind, you’re ready to tackle your next DIY resin river table project like a pro! Start by doing your research and prepping all your materials and tools for your table. Pick and shape your wood, create your mold, fill it with your resin, and don’t forget the finishing touches! Good luck and happy crafting!


